

Building wxWidgets applications using Microsoft Visual Studio
Introduction
In tutorial, we basically review the process of building wxWidgets applications using Microsoft Visual Studio. It basically involves configuring Microsoft Visual Studio to see certain library dependencies for successful application builds.
There are but two kinds of applications that can be built in C++ or other programming languages. These are console based or GUI based. Console based applications have no user interface and they typically use commands which are executed by a user over a command line like in the MS DOS.
On the other hand, GUI based applications employ user interfaces which receive user input, process the input and then update the application view as dictated by the application logic. Unfortunately, not all programming languages (like C++ and C) have in built GUI support and so developers usually really on GUI libraries to add user interfaces to their applications. One of such libraries is wxWidgets.
So in this post, we are going to learn how to get started with wxWidgets, in the process, building a simple wxWidgets C++ application using Microsoft Visual Studio 2017.
What is wxWidgets
wxWidgets is a programmer’s toolkit for writing desktop or mobile applications with graphical user interfaces (GUIs). It’s a framework, in the sense that it does a lot of the housekeeping work and provides default application behavior. The wxWidgets library contains a large number of classes and methods for the programmer to use and customize.
Applications typically show windows containing standard controls, possibly drawing specialized images and graphics and responding to input from the mouse, keyboard, or other sources. They may also communicate with other processes or drive other programs.
In other words, wxWidgets makes it relatively easy for the programmer to write an application that does all the usual things modern applications do.
Installing and building wxWidgets
Before you go ahead, we assume you have already downloaded MS Visual Studio on your computer or else, download it from here and install it.
We shall now head over to the wxWidgets downloads page, to download a zipped version of the wxWidgets source code or a windows installer. Which ever method you use to install wxWidgets on your computer, just make sure you note the folder where the wxWidgets source code has been installed. For example, let us assume you installed it in the C drive: C:/wxWidgets-3.1.3
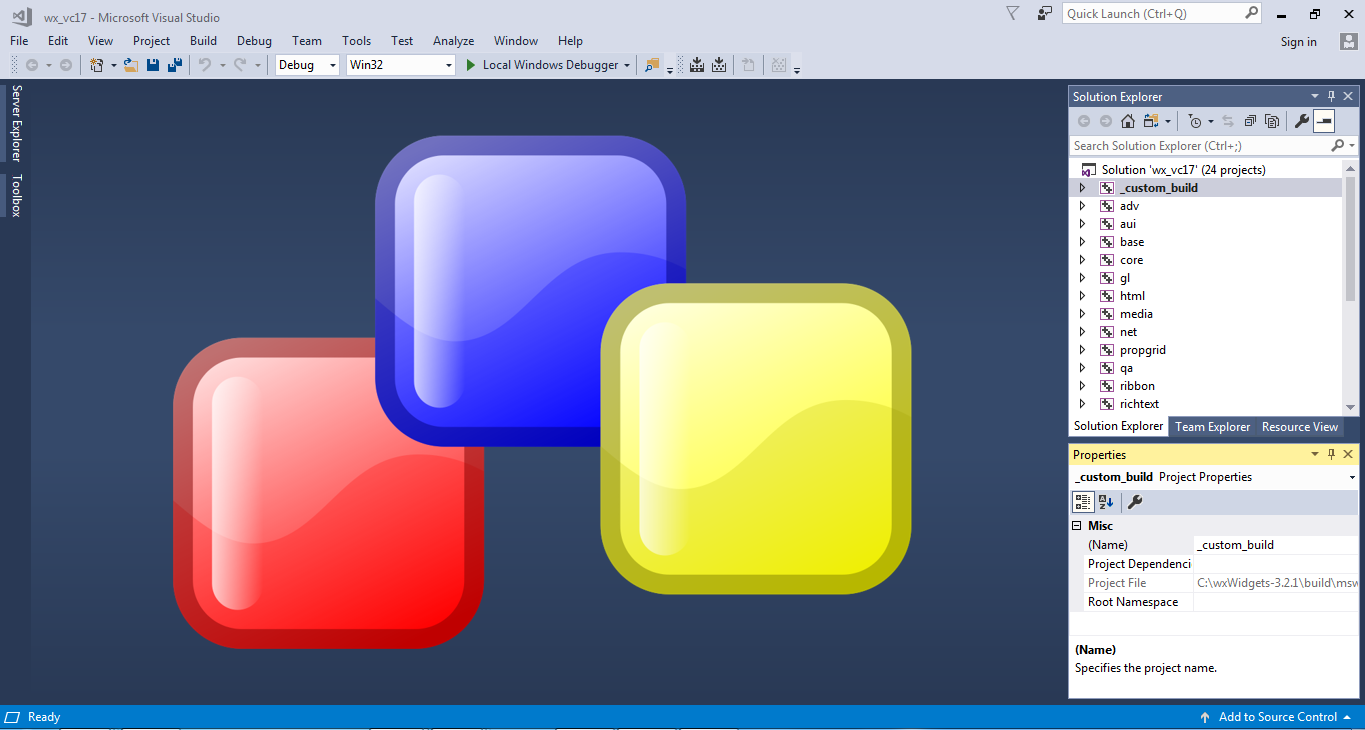
To build wxWidgets using MS Visual Studio, head over to the wxWidgets folder, our case (C:/wxWidgets-3.1.3) and follow through the directory structure; C:/wxWidgets-3.1.3/build/msw. Under the msw folder, you will find MS Visual studio solution files. Double click a solution file our case; wx_vc17.sln to open it using Microsoft Visual Studio.

Then build the opened solution to compile various versions of the wxWidgets library; the Debug, DLL Debug, DLL Release and lastly the Release
- To start this process; select the version to compile using the drop down menu in the tool bar
- Then go to menu item: Build > Build Solution.
- Click Build Solution to start the compilation process for the selected library version. This takes some time. So you need to wait.
- Repeat the steps 1-3, for all the four library versions
- After compiling wxWidgets, close MS Visual Studio
Creating a wxWidgets application in Microsoft Visual Studio
To create a simple C++ application, follow the steps below;
1. Open MS Visual Studio and then create a new project. Go to menu item: File > New > Project
2. A new project dialog window appears from which you will select: Visual C++ > Empty Project. Then you enter your project name and where you want to store your application.

3. Click Ok. MS Visual Studio will then go on to create an empty project named SimpleApplication to which you will add C++ files.

4. Then add a Main.cpp file to our new project. To do this, navigate to the solution explorer window document tree where there is a Source Files folder. Click on it to select it and then right click. A pop up menu opens. Go to menu item: Add > New Item. Click New Item. An add new item window appears from which you will name your file Main.cpp.

5. Click Add to add the file to our project

6. Now, copy the C++ code below and add it to your Main.cpp file.
// wxWidgets "Hello World" Program
// For compilers that support precompilation, includes "wx/wx.h".
#include <wx/wxprec.h>

#ifndef WX_PRECOMP
#include <wx/wx.h>
#endif

#define ID_MENU_HELLO   1 // Menu Item ID

//////////////////////////////////////////////////////////////////////////////////////////////////
/////  DECLARE THE APPLICATION'S MAIN FRAME WINDOW
//////////////////////////////////////////////////////////////////////////////////////////////////

class Frame : public wxFrame
{
public:
	Frame(const wxString& title, const wxPoint& pos, const wxSize& size);
private:
	void OnHello(wxCommandEvent& event);
	void OnExit (wxCommandEvent& event);
	void OnAbout(wxCommandEvent& event);
};

//////////////////////////////////////////////////////////////////////////////////////////////////
/////   DECLARE THE APPLICATION CLASS
//////////////////////////////////////////////////////////////////////////////////////////////////

class HelloWorld : public wxApp
{
public:
	// Define the initialization method
	// Its called on application start up
	virtual bool OnInit();
};

//////////////////////////////////////////////////////////////////////////////////////////////
///// IMPLEMENT THE OnInit() WHICH INITIALIZES THE APPLICATION
/////////////////////////////////////////////////////////////////////////////////////////////
bool HelloWorld::OnInit()
{
	// Create main application window
	Frame *frame = new Frame("Hello World", wxPoint(50, 50), wxSize(300, 300));

	// Display the frame window
	frame->Show(true);

	// Start the event loop
	return true;
}

////////////////////////////////////////////////////////////////////////////////////////
///// START RUNNING THE APPLICATION
////////////////////////////////////////////////////////////////////////////////////////

wxIMPLEMENT_APP(HelloWorld);

////////////////////////////////////////////////////////////////////////////////////////
///// IMPLEMENT THE FRAME (APP MAIN WINDOW) CONSTRUCTOR
///////////////////////////////////////////////////////////////////////////////////////

Frame::Frame(const wxString& title, const wxPoint& pos, const wxSize& size)
	:wxFrame(NULL, wxID_ANY, title, pos, size)
{
	wxMenu *menuFile = new wxMenu;
	menuFile->Append(ID_MENU_HELLO, "&Hello...\tCtrl-H", "Help string shown in status bar for this menu item");
	menuFile->AppendSeparator();
	menuFile->Append(wxID_EXIT);

	wxMenu *menuHelp = new wxMenu;
	menuHelp->Append(wxID_ABOUT);

	wxMenuBar *menuBar = new wxMenuBar;
	menuBar->Append(menuFile, "&File");
	menuBar->Append(menuHelp, "&Help");

	SetMenuBar(menuBar);
	CreateStatusBar();
	SetStatusText("Welcome to wxWidgets!");

	// Register events for this frame
	Bind(wxEVT_MENU, &Frame::OnHello, this, ID_MENU_HELLO);
	Bind(wxEVT_MENU, &Frame::OnAbout, this, wxID_ABOUT   );
	Bind(wxEVT_MENU, &Frame::OnExit,  this, wxID_EXIT    );
}

///////////////////////////////////////////////////////////////////////////////////////////////////////////
//////    DEFINE EVENT HANDLERS FOR THE APPLICATION FRAME
///////////////////////////////////////////////////////////////////////////////////////////////////////////

// Event Handler for clicking the About Menu item
// Navigate to Help > About in the GUI app
void Frame::OnAbout(wxCommandEvent& event)
{
	wxMessageBox("This is a wxWidgets Hello World example", "About Hello World", wxOK | wxICON_INFORMATION);
}

// Event Handler for clicking the Hello Menu item
// Naviaget to File > Hello in the GUI app
void Frame::OnHello(wxCommandEvent& event)
{
	wxLogMessage("Hello world from wxWidgets!");
}

// Event handler on clicking the Exit Menu item
// Navigate to File > Exit in the GUI app
void Frame::OnExit(wxCommandEvent& event)
{
	Close(true);
}
The Main.cpp file will have quite a number of errors since Visual Studio cannot recognize the code in the file. You will need to add wxWidgets dependencies to the project to remove these errors so that you can successfully compile your project.
Adding the necessary dependencies to build a wxWidgets application
This will basically involve adding wxWidgets dependencies to three build configurations in MS Visual Studio; all configurations, debug and release. We shall begin with all configurations properties.
All Configurations
- Go to menu item: Project > SimpleApplication Properties. Click SimpleApplication Properties to open the project property window. From the configuration drop down, select All Configurations.
- Go to Configuration Properties > C/C++ > General > Additional Include Directories > Edit > New Line and then navigate to the wxWidgets source code folder and add the include directory for my case: C:/wxWidgets-3.2.1/include. Then click Ok.
- Go to C/C++ > Preprocessor > Preprocesor Definitions > Edit. A dialog appears where you will add WXUSINGDLL into the text area and then click Ok.
- Go to Linker > Additional Library Directories > Edit > New Line and then navigate to the wxWidgets folder > lib > vc_dll (for my case: C:/wxWidgets-3.2.1/lib/vc_dll) to add the vc_dll library. Click Ok and Apply the changes.

Debug
- Under the configuration drop down, switch to Debug
- Go to C/C++ > General > Additional Include Directories > Edit > New Line and then navigate to the wxWidgets source code folder > lib > vc_dll > mswud to add the mswud library. Click Ok.
- Go to Linker > input > Additional Dependencies > Edit. A dialog appears where you will add the base library, wxbase32ud.lib and the core library, wxmsw32ud_core.lib. Note that the figure 32 in these library names will change depending on the version of wxWidgets you are using for example; version 3.1.3, it will be 31 and for version 3.2.1, it will be 32. To be certain, navigate to the wxWidgets source code folder > lib > vc_dll (for my case: C:/wxWidgets-3.2.1/lib/vc_dll) where these libraries are stored and take a look at their names.
- Then click Ok and Apply the changes.

Release
- Under the configuration drop down, switch to Release
- Go to C/C++ > General > Additional Include Directories > Edit > New Line and then navigate to the wxWidgets folder > lib > vc_dll > mswu to add the mswu library. Click Ok.
- Go to Linker > input > Additional Dependencies > Edit. A dialog appears where you will add the base library, wxbase32u.lib and the core library, wxmsw32u_core.lib. To be certain, go to the wxWidgets source code folder > lib > vc_dll (for my case: C:/wxWidgets-3.2.1/lib/vc_dll) where these libraries are stored and take a look at their names. Note that the figure 32 in these library names will change depending on the version of wxWidgets you are using. It’s also worth noting that the release and debug versions of the library files defer by just a d after that u.
- Then click Ok and Apply the changes.

After adding these dependencies, you will notice that the errors we had in our Main.cpp file are gone. Should you run the application at this point by clicking the local windows debugger button, MS Visual studio will notify you with a system error showing that you are missing some .dll files.
So, to add the needed files, move to wxWidgets source code folder > lib > vc_dll. If you compiled a Debug version of your app in MS Visual Studio, copy and paste both the debug version core and base libraries, wxbase321ud_vc_custom.dll and wxmsw321ud_core_vc_custom.dll respectively to the Debug folder of your SimpleApplication. For a Release version, you will copy the wxbase321u_vc_custom.dll and wxmsw321u_core_vc_custom.dll respectively to the Release folder of your SimpleApplication. Now run the application and MS Visual Studio will display your GUI application.


8 Comments on “Building wxWidgets applications using Microsoft Visual Studio”
I am trying to compile by these steps.
At the compilation stage I get an error as below.
1>MSVCRTD.lib(exe_main.obj) : error LNK2019: unresolved external symbol _main referenced in function “int __cdecl invoke_main(void)” (?invoke_main@@YAHXZ)
Hello Poonam,
The problem you are having is a linker error.
It usually happens when you wrongly configure your project i.e; you are building your project
as a console (command based) app instead of a GUI one.
So check your project configuration: Project -> Properties -> Linker -> System -> Subsystem
On the SubSystem option, set the drop down value to Windows (/SUBSYSTEM:WINDOWS)
Let me know if the issue is solved.
Regards
It works well by starting a project as a Desktop Application rather than Empty Project in visual studio.
Are you meaning starting a project as a Windows Desktop Application.
Such a setting is meant to create windows GUI applications using the low level Windows API.
I haven’t tried that before but hope it worked well and built successfully!!
Many thanks for this. Just managed to get it going with 3.2.5 and VS 17.10.1
I had one problem that others might hit… you must set properties->Linker->System to Windows (/SUBSYSTEM:WINDOWS), otherwise main() is not found (starting with Empty Project).
Glad that you managed to get it going …
This worked as advertised and was a lot of help getting started. Except, of course, for the main() issue. Why not update this page with the extra bit? Not sure about the Windows Desktop Application suggestion. If it also makes an empty project but with the /SUBSYSTEM:WINDOWS option set then it’s a winner. If not, go with the simple change in Project -> Properties -> Linker -> System -> Subsystem. Thanks for the good work.
I am glad that I offered that necessary support to get you started and Thanks Paul for the wonderful suggestions.